Pixie is an easy-to-use color picker. Just simply point to a color and it will tell you the hex, RGB, HTML, CMYK and HSV values of that color. Pixie works on Windows 95/98/Me/NT/2000/XP/Vista, any body who is dealing with web programming or design needs to have such a simple and perfect tool to make it easy on Internet life. Pixie will also show the current x y position of your mouse pointer. If you need to work with colors, then it's the tool which you need.
To download Pixie for free: http://www.nattyware.com/pixie.html
Sunday, September 28, 2008
Friday, September 26, 2008
How to get Tables' name, Columns' name, and Column's type in Sql 2005
In MS Sql Server 2005, if you open SSMS (SQL Server management
Studio), in Object Explore under "Views" node for your DataBase,
you can find "System Views". sys.tables keeps information about
your created tables and sys.columns contains info about columns
(Fields) of your tables in the DataBase.
Then to get the columns and data type of them in tables which
have been created in the DataBase, the following code would be
a good example to start and play around it to explore more about
data of the data or the meta data:
select tbl.name as tableName,
clmn.name as columnName,
typ.name as typeName
from sys.columns as clmn
inner join sys.tables tbl
on clmn.object_id = tbl.object_id
inner join sys.types typ
on clmn.system_type_id = typ.system_type_id
order by tbl.name
How to get Tables' name, Columns' name, and Column's type in Sql 2005
Cropper - Point and Shoot Screen Captures
Cropper is a great screen capture tool which is written by Brian Scott in C#.NET
Point, Crop, and Save any area which you like just for free.
Cropper - Point and Shoot Screen Captures
Thursday, September 25, 2008
JR Screen Ruler - A tool to measure a picture size
JR Screen Ruler is a handy and free tool which help you to find out the size of an image that is located on screen. Everybody who is dealing with web pages knows how much it worth. To get it for free, go to the following URL:
http://www.spadixbd.com/freetools/index.htm
JR Screen Ruler - A tool to measure a picture size
Monday, September 22, 2008
How to limit the number of rows to enter in DataGridView
In a DataGridView if the number of rows should be limited to a
predefined value, we can switch AllowUserToAddRows to "true"
or "false", it will let the user be able to add new rows or stop
the user for entering more new rows.
RowLeave event is the place to count number of Rows and if it's
equal to limit, then we need to stop adding more. on the other hand
if user delete some row(s), it opens new room for adding new ones.
In the following part of code I considered to have just 20 rows in
our DataGridView control:
private void dgv1_RowLeave(object sender, DataGridViewCellEventArgs e)
{
if (dgv1.Rows.Count >= 20)
dgv1.AllowUserToAddRows = false;
}
private void dgv1_RowsRemoved(object sender, DataGridViewRowsRemovedEventArgs e)
{
if (dgv1.Rows.Count < 20)
dgvTmp.AllowUserToAddRows = true;
}
How to limit the number of rows to enter in DataGridView
Sunday, September 21, 2008
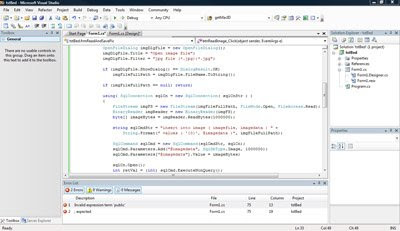
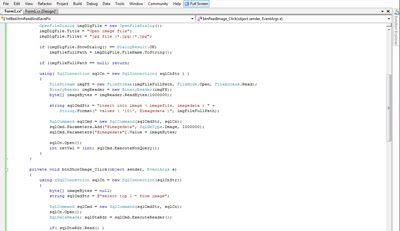
How to make Visual Studio Full Screen
When I want to change Visual Studio from normal size To Full screen,
I use Shift+Alt+Enter, then I will have just menu and almost all the
screen will occupy by code which help us to have a good area to deal
with the code lines.
It works like F11 in Internet Explorer to show your web page in full screen.
I use Shift+Alt+Enter, then I will have just menu and almost all the
screen will occupy by code which help us to have a good area to deal
with the code lines.
It works like F11 in Internet Explorer to show your web page in full screen.
How to make Visual Studio Full Screen
Saturday, September 20, 2008
How to clear "Recent Projects" in Visual Studio
Well, to clear list of projects in "Recent Projects" in start
page of Visual Studio simply just we need to clear something
in registry.
1- Run registry editor in Windows:
Start->Run->RegEdit
2- Goto the following area in registry file:
HKEY_CURRENT_USER\Software\Microsoft\VisualStudio\8.0\ProjectMRUList
"8.0" is for Visual Studio 2005, depend on the Visual Studio version
which you installed, this number can be something else.
3- Remove any one of unnecessary values in above area, the key value
name starts with "file" like: file1, file2, ...
Another solution:
1- Add the following lines in a text file and save it in any name which you
like with ".reg" extention:
[-HKEY_CURRENT_USER\Software\Microsoft\VisualStudio\8.0\ProjectMRUList]
[HKEY_CURRENT_USER\Software\Microsoft\VisualStudio\8.0\ProjectMRUList]
"8.0" is for Visual Studio 2005, depend on the Visual Studio version
which you installed, this number can be something else.
2- Anytime which you like to clear the list of projects in "Recent Projects",
double click on the created .reg file.
How to clear "Recent Projects" in Visual Studio
Sunday, September 14, 2008
How to add images for a Node in TreeView control
To add images in a Node for treeview control
1- Add new ImageList component to your form
2- Add bitmap images (normally 16 x 16) to your project (Project->Add new Item).
3- Select your ImageList and poulate Images property with each o images (Images Collection Editor form).
4- Set ImageList property of your TreeView control to your ImageList component.
5- Add nodes to your treeview control with using ImageIndex, Image Index starts from 0
Example:
Look at "TreeNode.ImageIndex Property" in MSDN
1- Add new ImageList component to your form
2- Add bitmap images (normally 16 x 16) to your project (Project->Add new Item).
3- Select your ImageList and poulate Images property with each o images (Images Collection Editor form).
4- Set ImageList property of your TreeView control to your ImageList component.
5- Add nodes to your treeview control with using ImageIndex, Image Index starts from 0
Example:
myTreeNode = new TreeNode(myMovie.movieName, 0, 0);
treeViewMovies.Nodes.Add(myTreeNode);
for next image you can use 1 and so .Look at "TreeNode.ImageIndex Property" in MSDN
How to add images for a Node in TreeView control
Saturday, September 13, 2008
Change ForeColor of a TextBox control
When we disable a TextBox, we can change its BackColor but if we change the ForeColor, it doesn't apply. To solve the problem, I created a new class based on TextBox and changed the OnPaint method to do the ob for me:
- Add a new class to your solution
- Define your new class based on TextBox
- Customize its properties
- Add it to your form controls like this:
http://austinleng.spaces.live.com/Blog/cns!6F894DC66A2F0AFF!454.entry
- Add a new class to your solution
- Define your new class based on TextBox
public class MyTextBox : TextBox
{
public MyTextBox()
{
this.SetStyle(ControlStyles.UserPaint, true);
}
protected override void OnPaint(PaintEventArgs e)
{
SolidBrush myDrwBrush = new SolidBrush(Color.Black);
e.Graphics.DrawString(this.Text, this.Font, myDrwBrush, 0F, 0F);
}
}
- Instantiate an object from the new class on your form- Customize its properties
- Add it to your form controls like this:
MyTextBox myTxtBox = new MyTextBox();
myTxtBox.Location = new System.Drawing.Point(12, 36);
myTxtBox.Name = "myTxtBox";
myTxtBox.Size = new System.Drawing.Size(260, 20);
myTxtBox.Text = "This is a test text box";
this.Controls.Add(myTxtBox);
- Disable it in your code to see the effect:this.Controls["myTxtBox"].Enabled = false
In addition, I found another similar solution in the following URL:http://austinleng.spaces.live.com/Blog/cns!6F894DC66A2F0AFF!454.entry
Change ForeColor of a TextBox control
How to search a text in Nodes of a TreeVew control?
The following methods can help to search a text in Nodes of a TreeView control recursively:
To call the method, I tested it by a Button control:
public TreeNode srchTxtInTreeView(TreeView trvToSrch, String strToSrch) |
{ |
// check if the treeView is not NULL |
if (trvToSrch == null) |
return null; |
// loop through the nodes in the treeview's root nodes |
for (int i = 0; i < trvToSrch.Nodes.Count; i++) |
{ |
TreeNode trvNode = srchTxtInTreeViewNode(trvToSrch.Nodes[i], strToSrch); |
if (trvNode != null) |
return trvNode; |
} |
return null; |
} |
public TreeNode srchTxtInTreeViewNode(TreeNode trvNode, String strToSrch) |
{ |
// check if the treeView is not NULL |
if (trvNode == null) |
return null; |
if (trvNode.Text == strToSrch) |
return trvNode; |
// loop through the nodes in the treeview's sub nodes |
for (int i = 0; i < trvNode.Nodes.Count; i++) |
{ |
// recursive call to itself to check lower level nodes |
TreeNode retTrvNode = srchTxtInTreeViewNode(trvNode.Nodes[i], strToSrch); |
if (retTrvNode != null) |
return retTrvNode; |
} |
return null; |
} |
To call the method, I tested it by a Button control:
private void button1_Click(object sender, EventArgs e) |
{ |
TreeNode retNode = srchTxtInTreeView(this.trvJust4Test, "Hello"); |
if (retNode != null) |
MessageBox.Show(retNode.ToString() + "Node Found!"); |
} |
How to search a text in Nodes of a TreeVew control?
Subscribe to:
Posts (Atom)